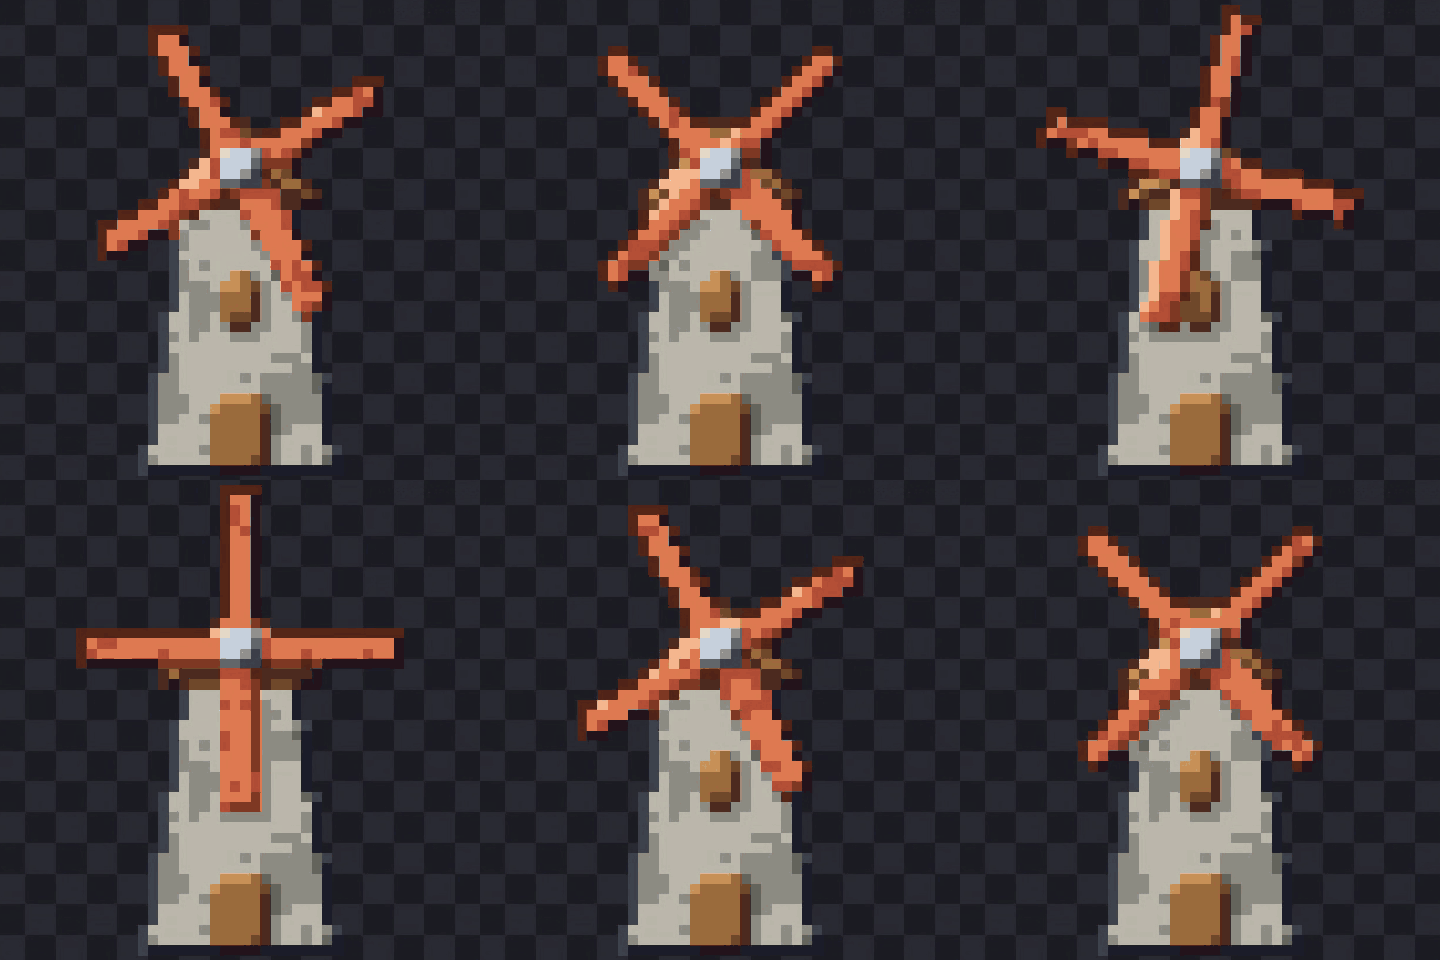
The windmill is two parts. The tower is four shapes that never move. The sails are two long boxes and a hub that turn together. You build the whole thing first, then capture three poses of the sails and let the Forge fill in the frames between them.
The colors below are the default palette. If you use another palette, pick the swatch that plays the same role, such as stone, wood or metal.
Build the windmill
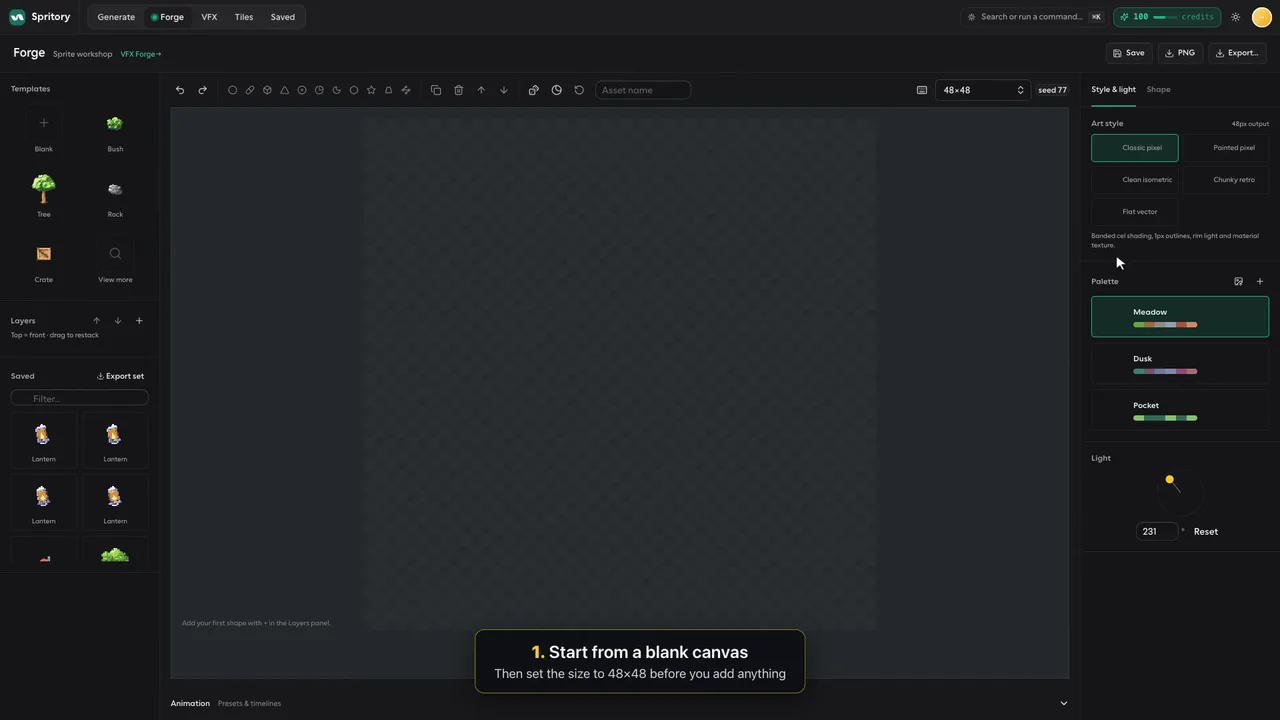
- Start from a blank canvas
Open the Forge and click Blank under Templates. Set the canvas size above the canvas to 48×48 before you add anything, so the sizes in the next steps fit.
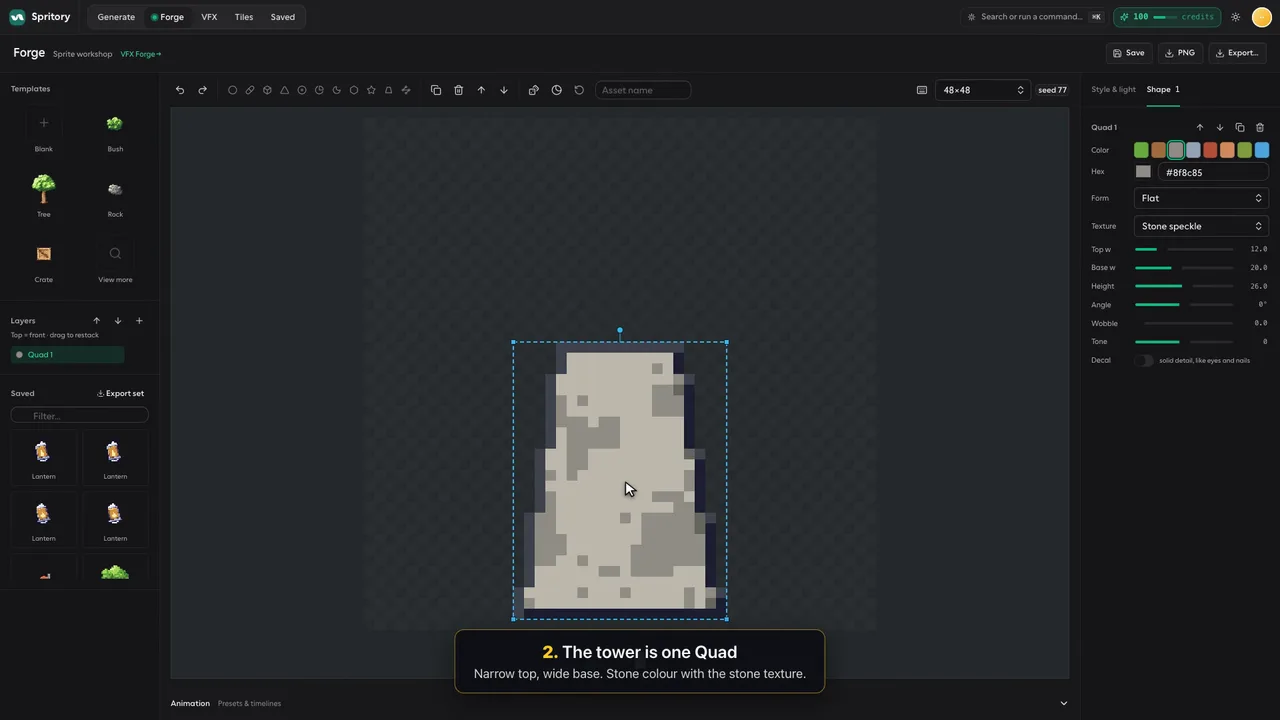
- The tower is one Quad
Add a Quad from the shape strip above the canvas. In the Shape tab, pick the stone swatch (#8f8c85), keep Form on Flat and set Texture to Stone speckle. Set Top w to 12, Base w to 20 and Height to 26. The narrow top and wide base give the tower its taper. Drag it to the bottom of the canvas.
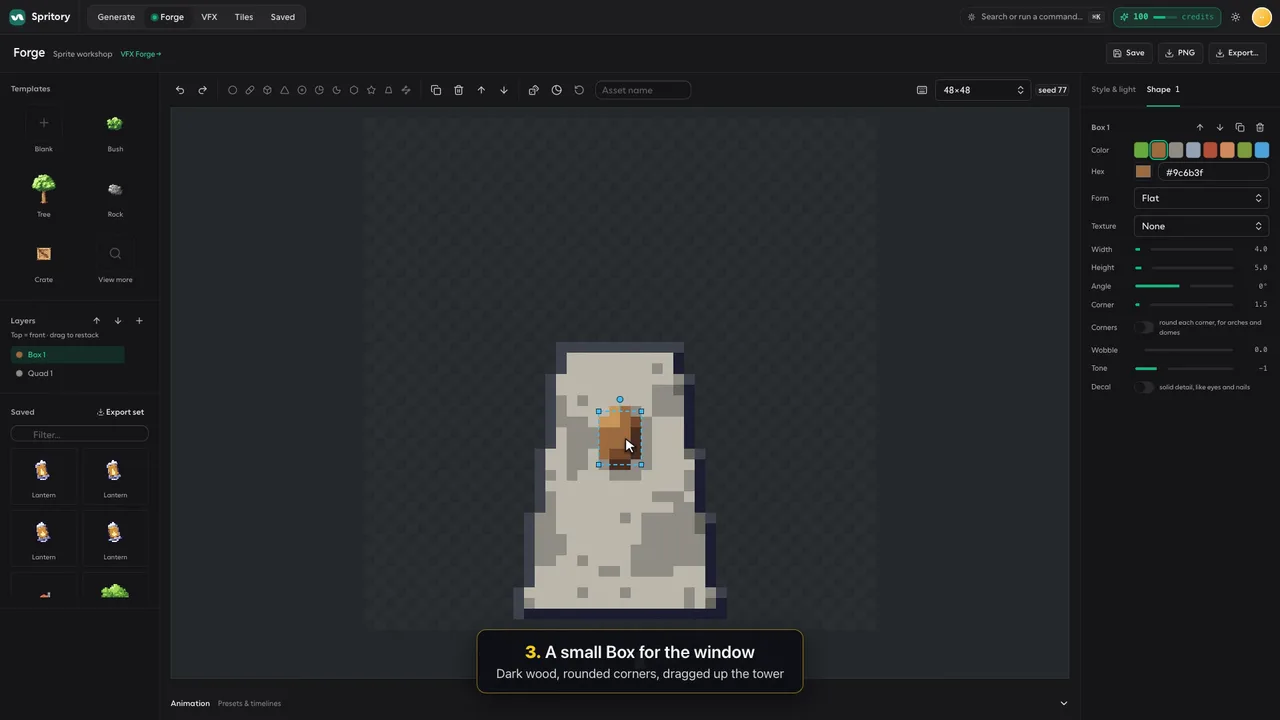
- A small Box for the window
Add a Box (X). Pick the wood swatch (#9c6b3f), set Width to 4, Height to 5, Corner to 1.5 and Tone to -1 for a darker wood. Drag it up the tower, about a third of the way from the top.
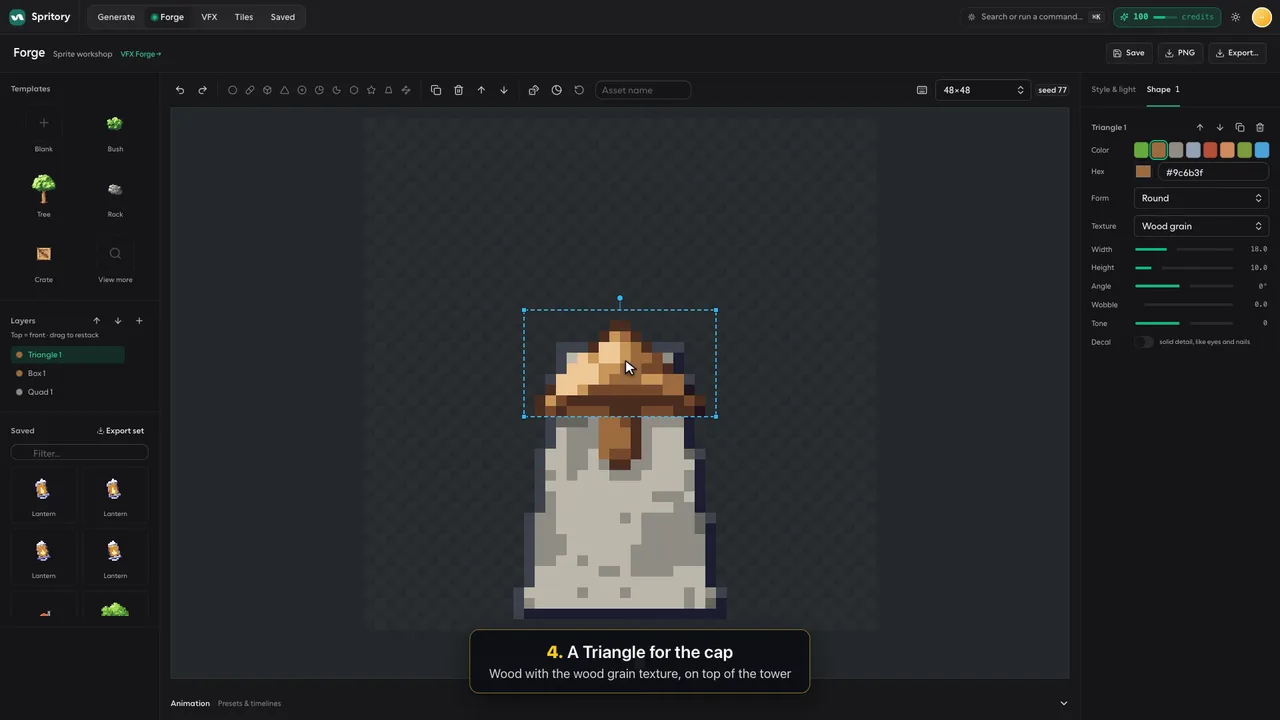
- A Triangle for the cap
Add a Triangle (T). Pick wood, set Form to Round and Texture to Wood grain. Set Width to 18 and Height to 10, then place it on top of the tower.
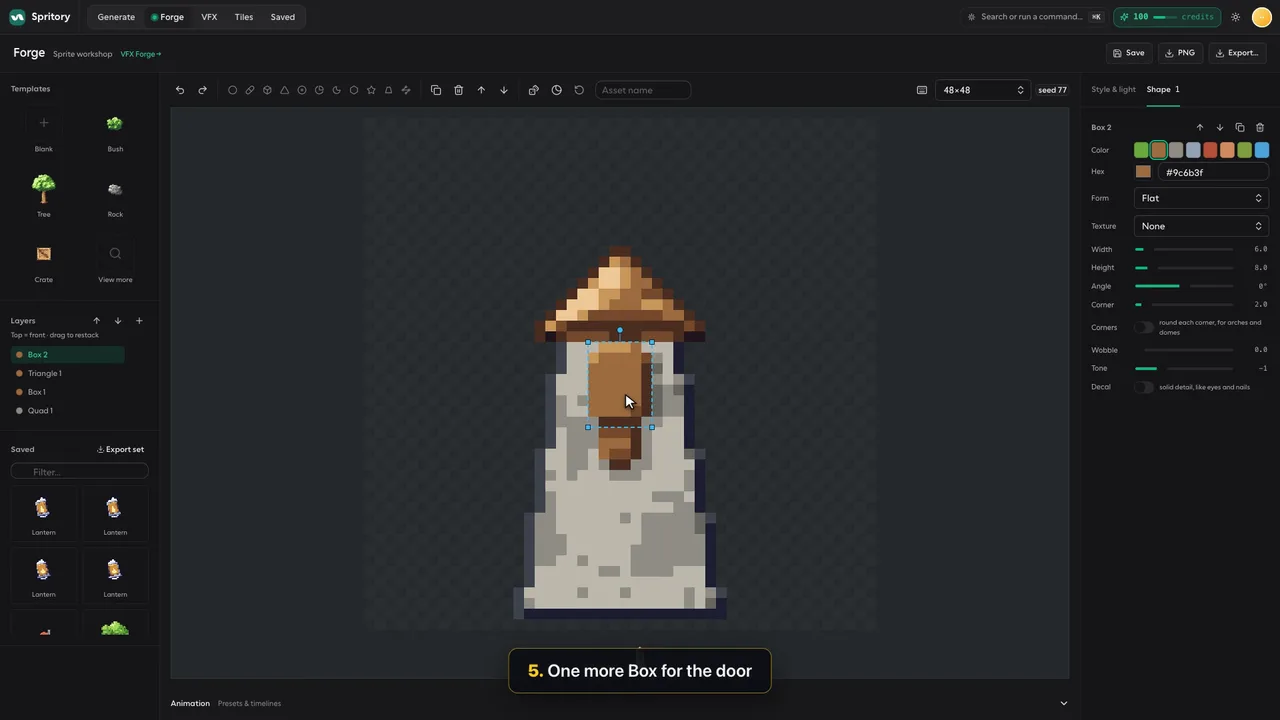
- One more Box for the door
Add another Box in wood with Width 6, Height 8, Corner 2 and Tone -1. Drag it to the foot of the tower.
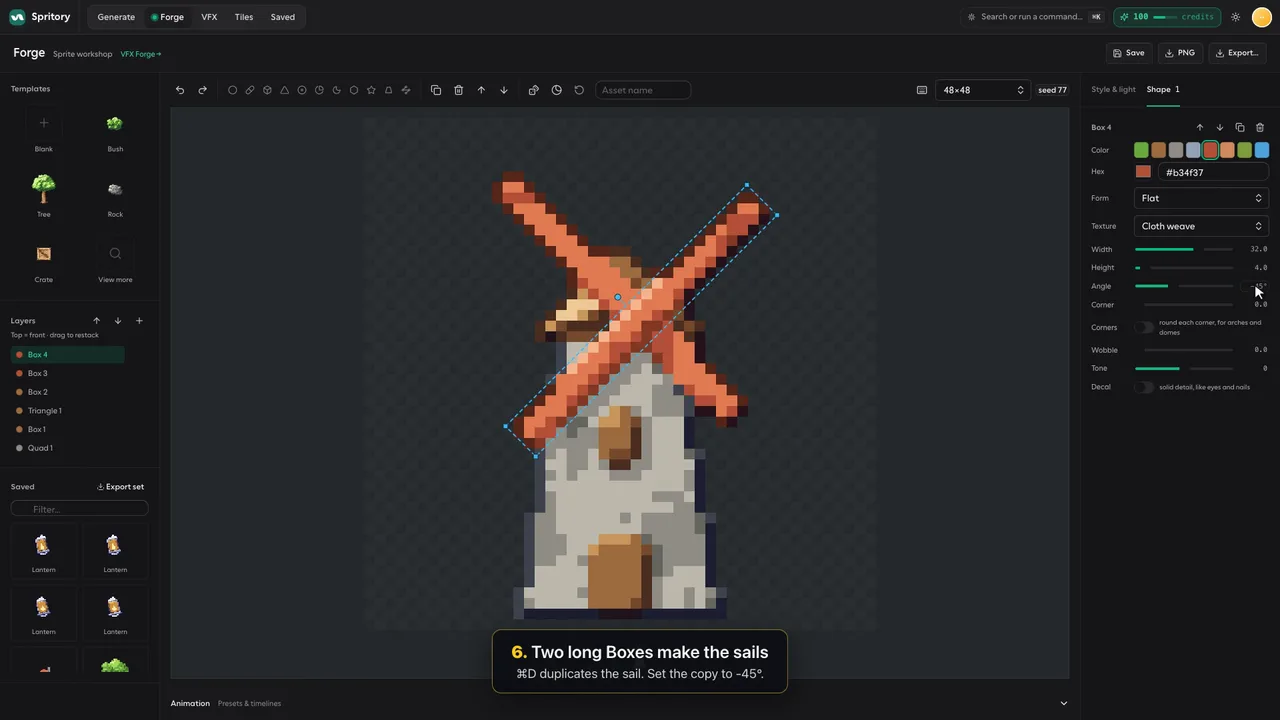
- Two long Boxes make the sails
Add a Box and pick the red swatch (#b34f37) with Texture set to Cloth weave. Set Width to 32, Height to 4 and Angle to 45°. Center it just under the cap, where the sails should meet.
Press ⌘D (Ctrl D on Windows) to duplicate the sail, and set the copy's Angle to -45°. Both sails share one center, so they cross in an X.
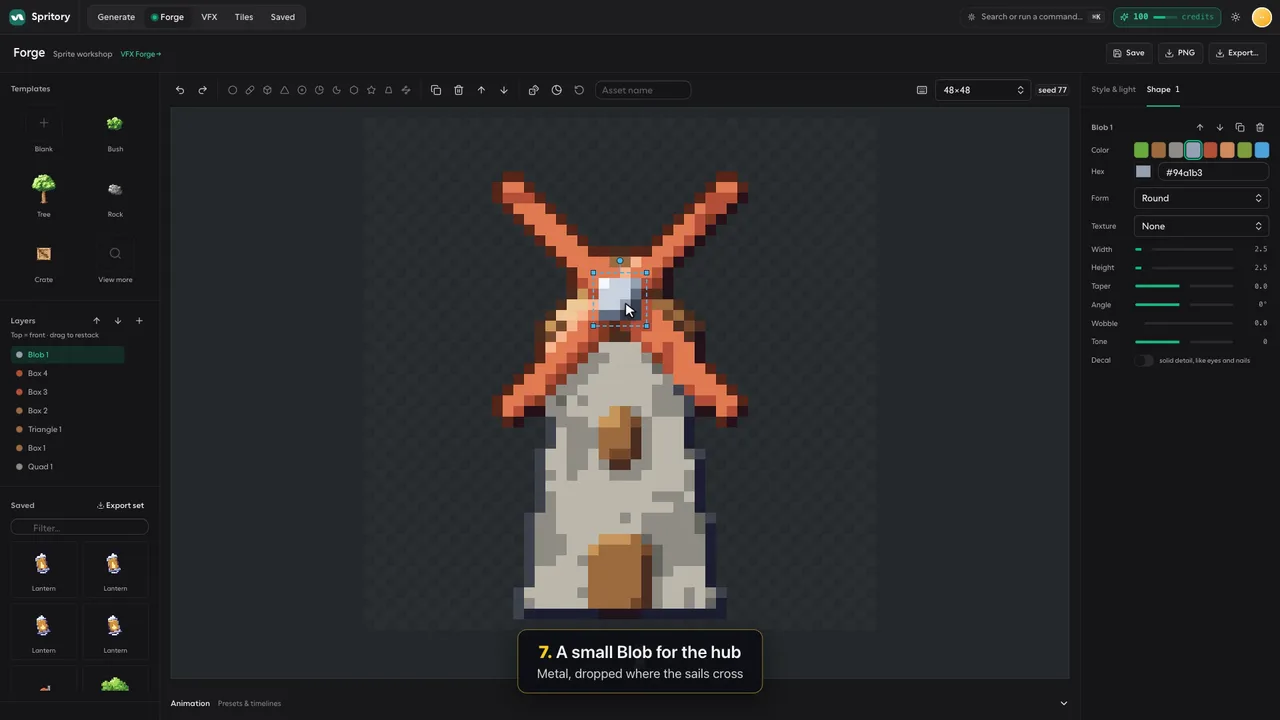
- A small Blob for the hub
Add a Blob (B) in the metal swatch (#94a1b3), Form Round, with Width and Height at 2.5. Drop it where the sails cross.
Make the sails spin
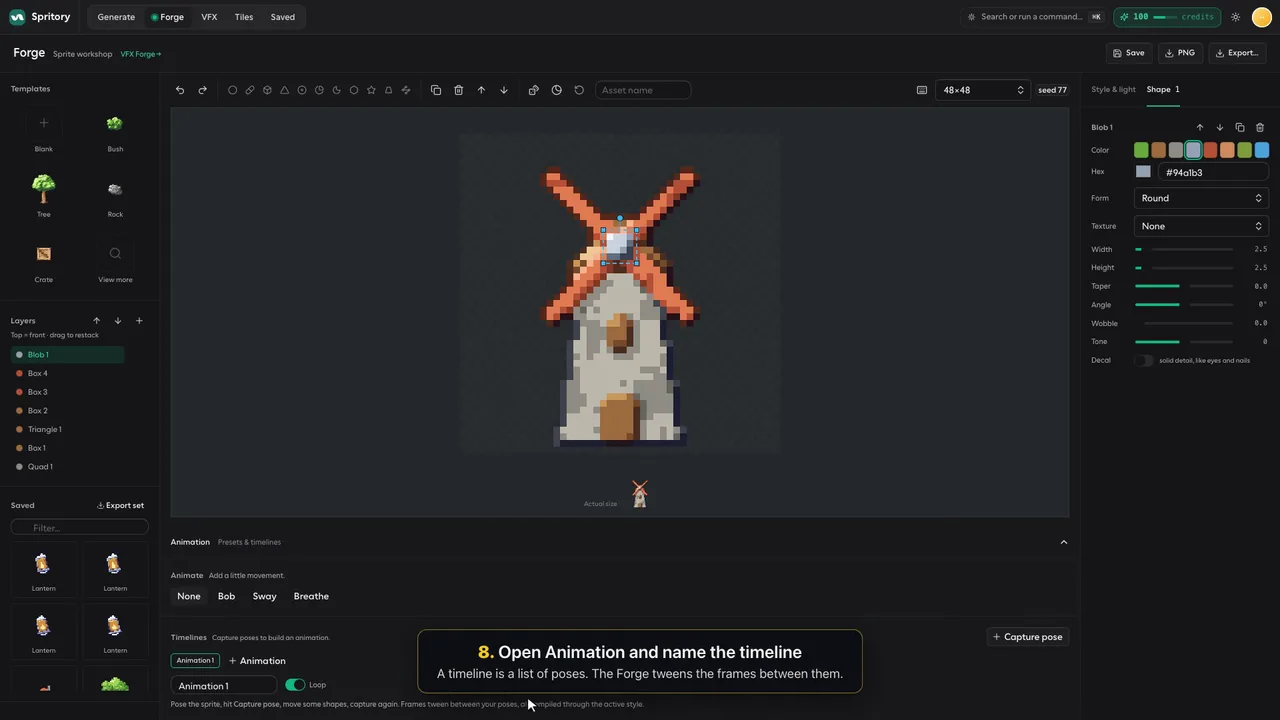
A timeline is a list of poses. You capture the sails at three angles, and the Forge tweens the frames between them.
- Open Animation and name the timeline
Open the Animation panel under the canvas and click + Animation. Name the timeline spin and turn on Loop.
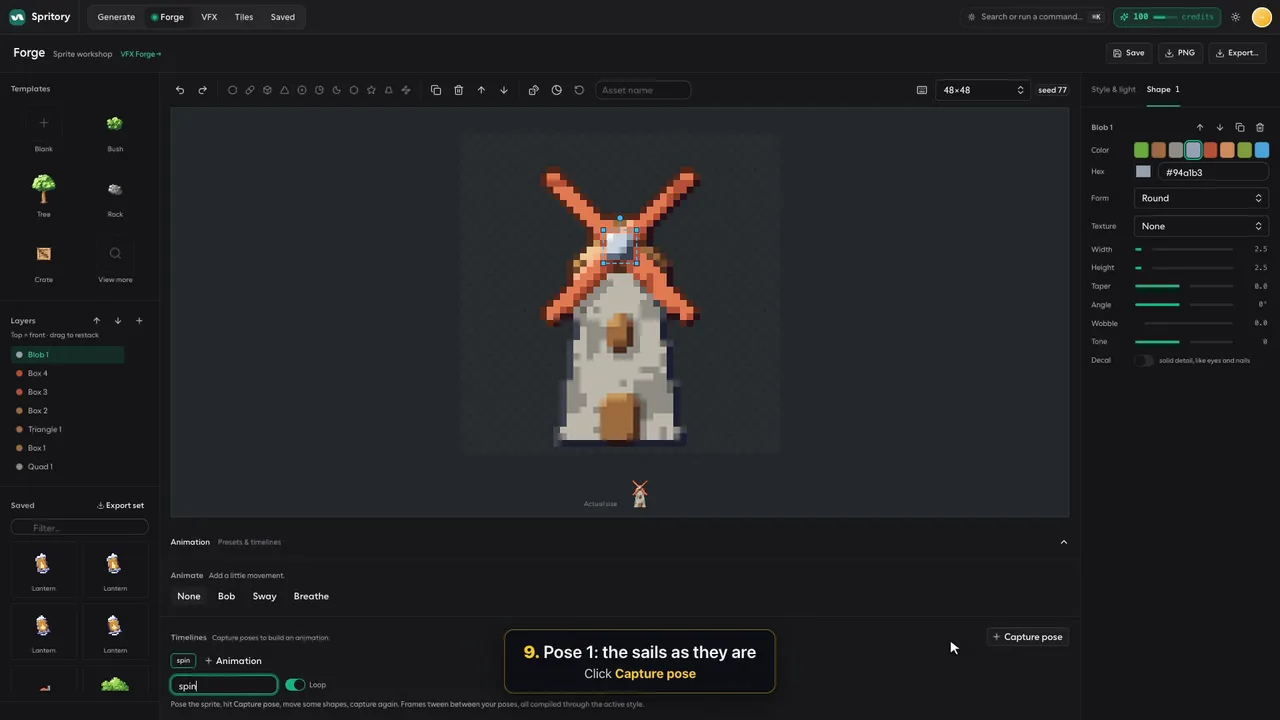
- Pose 1: the sails as they are
Click Capture pose (P). Name the pose 0° so the timeline is easy to read later.
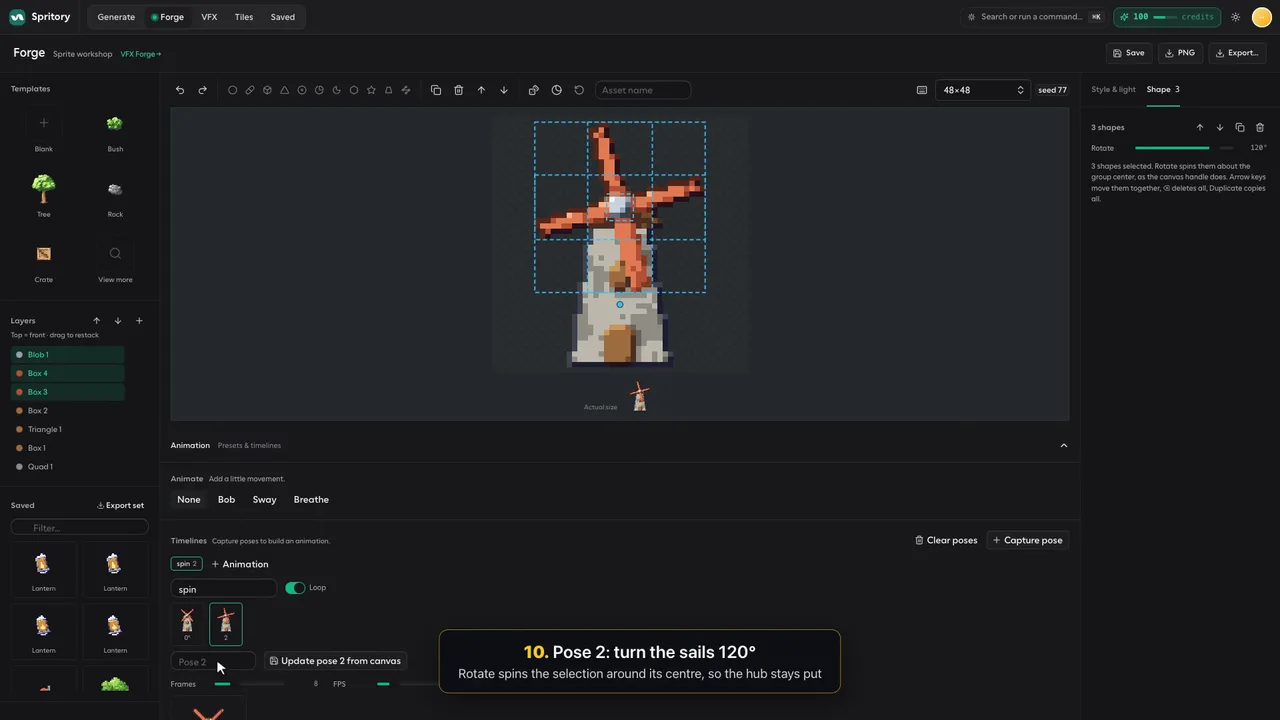
- Pose 2: turn the sails 120°
In Layers, click one sail, then Shift-click the other sail and the hub. The Shape tab now shows Rotate for the whole selection. Set it to 120°. Rotate spins the selection around its center, so the hub stays put. Click Capture pose and name it 120°.
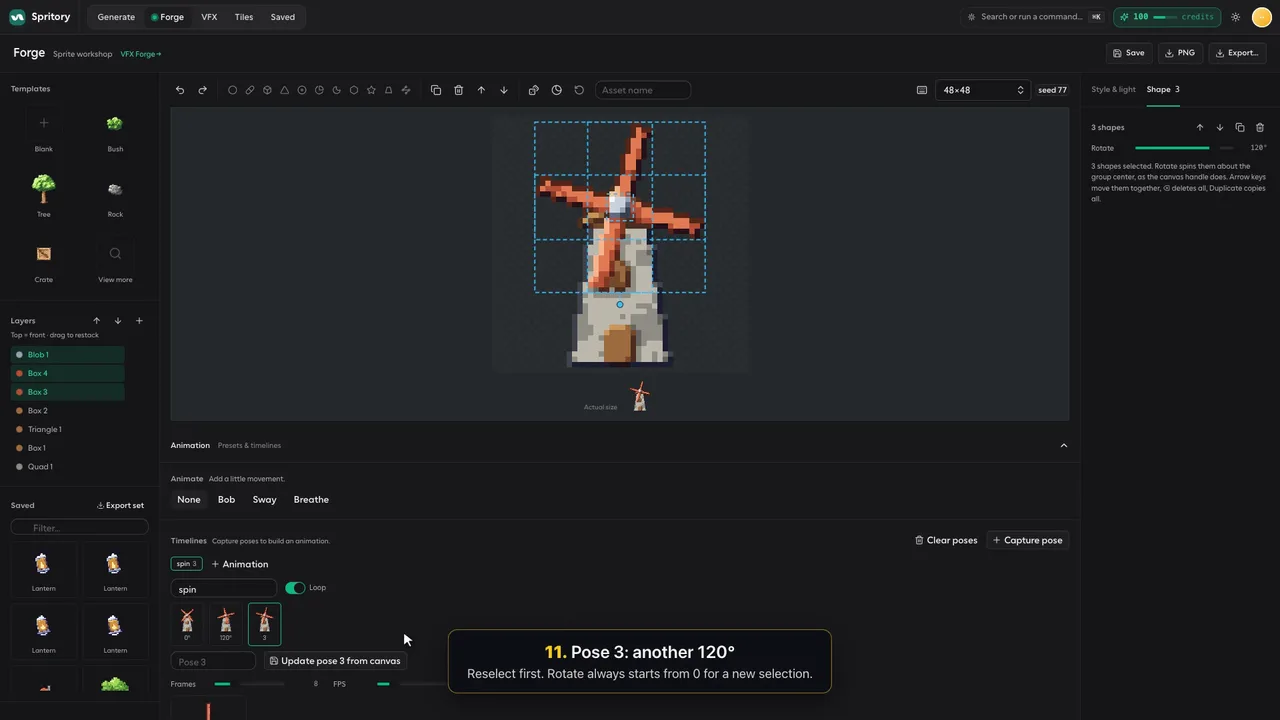
- Pose 3: another 120°
Select the same three shapes again first. Rotate always starts from 0 for a new selection, so set it to 120° again. Capture the pose and name it 240°.
- Set the timing
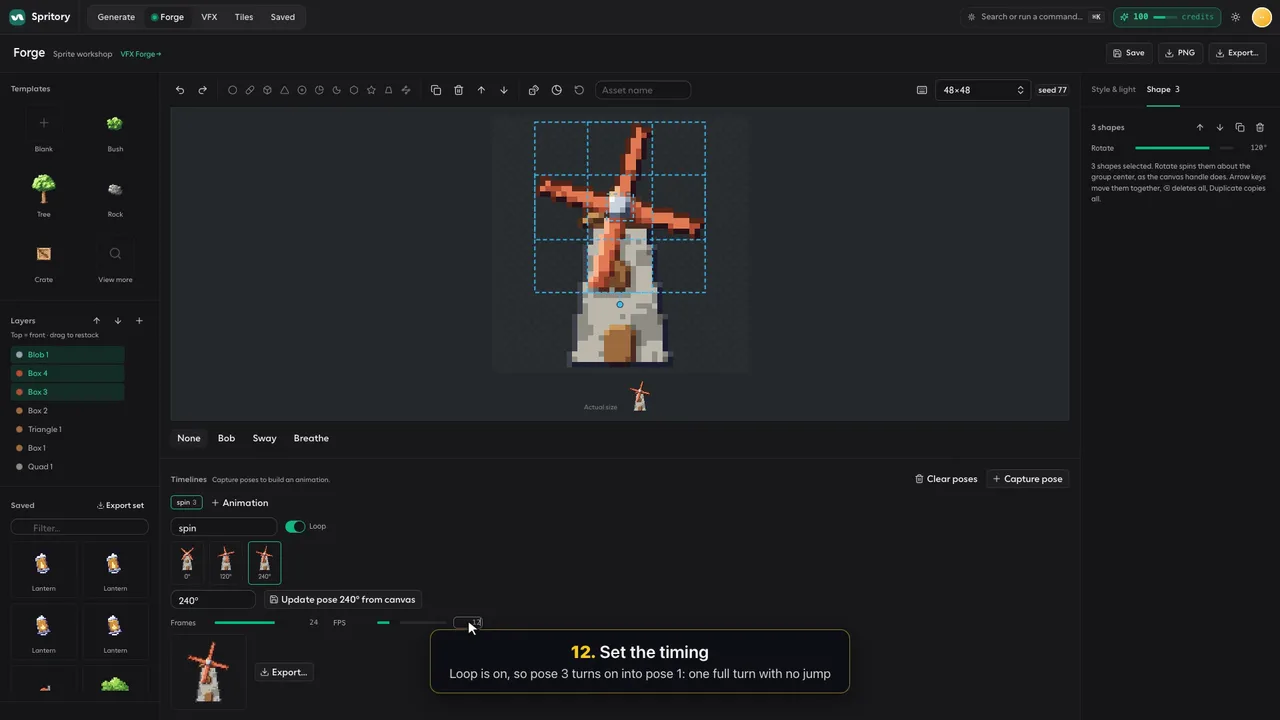
Under Timing, set Frames to 24 and FPS to 12. Three poses divide 24 evenly, so every pose lands on a frame. Loop is on, so the last pose turns on into the first one. That makes one full turn with no jump.
- Play it back
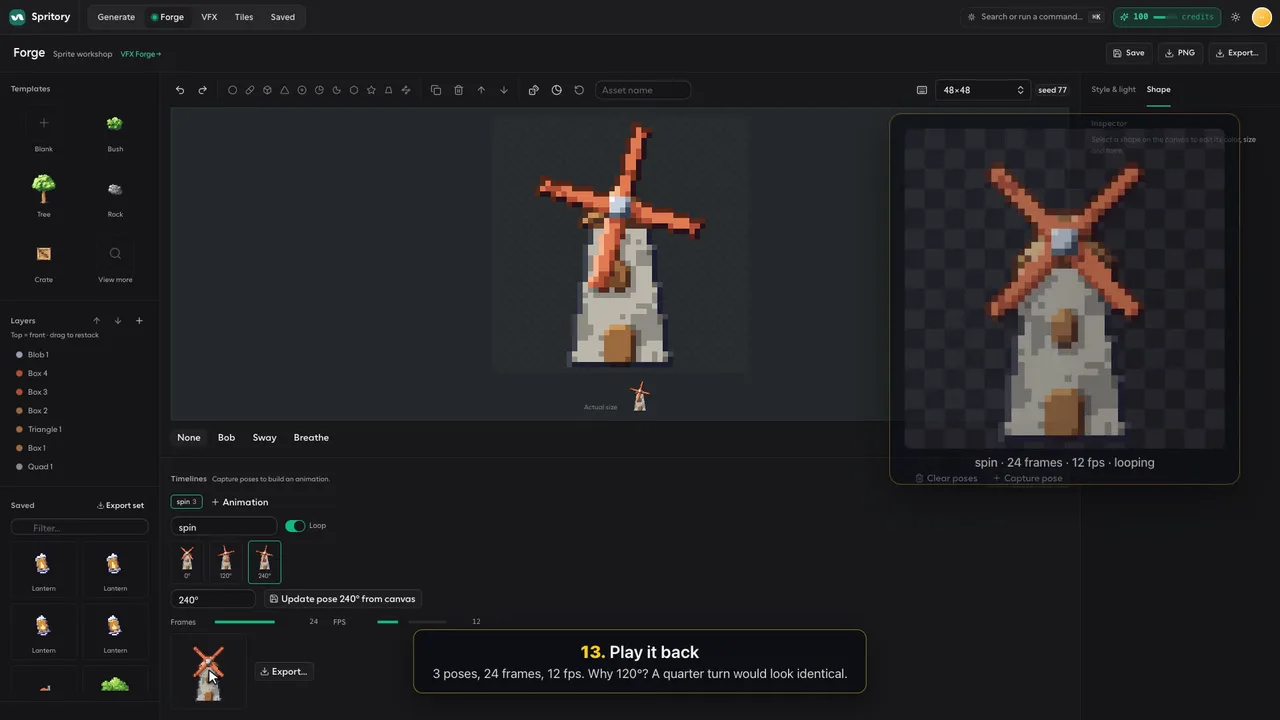
The preview plays the result: 3 poses, 24 frames, 12 FPS. One turn takes two seconds.
Why 120° and not 90°?The sails have four arms, so a pose turned 90° looks identical to the first one. Steps of 120° give three poses you can tell apart at a glance.
- Save it
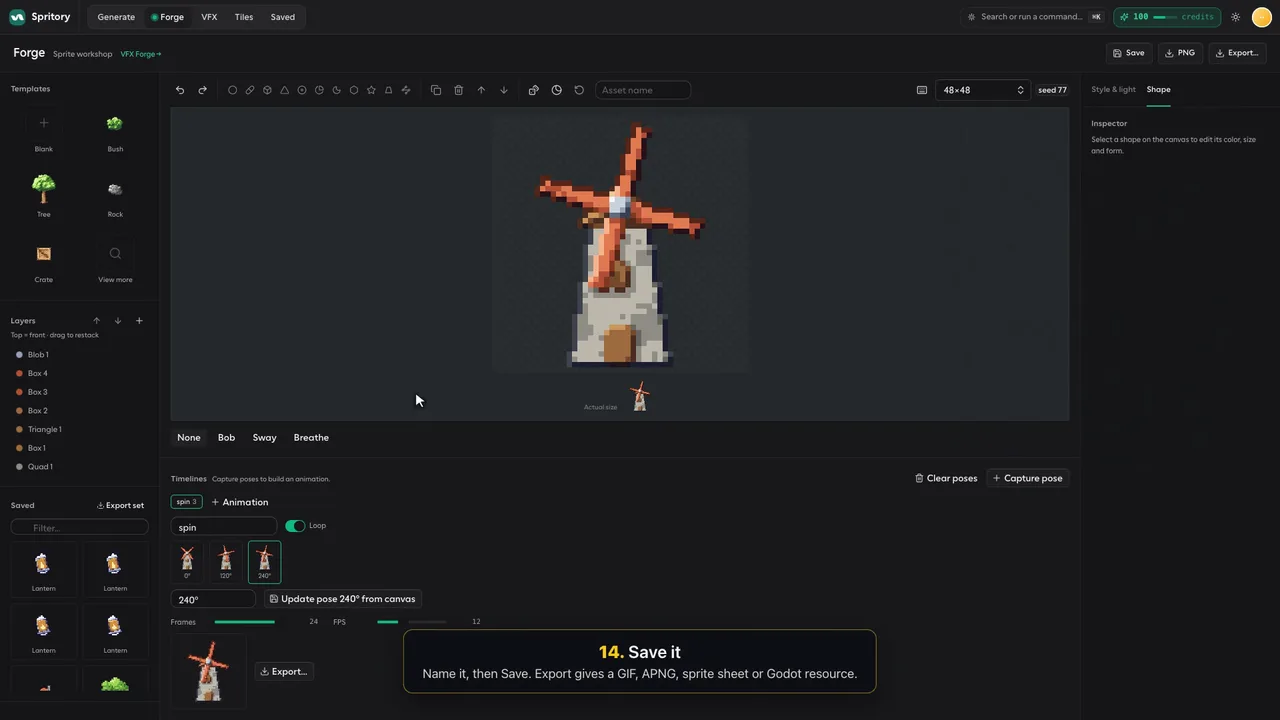
Name the asset, then click Save. Export gives you a GIF, APNG, sprite sheet or Godot resource. See Exporting to your game for each format.
Where to go next
The same idea works for anything with a part that turns or swings: a water wheel, a fan or a lid on a hinge. Build it still, then capture a few poses. The animation docs cover every timeline setting.